If you’re running an on-premises Exchange Server 2016 environment, you’ve probably run into this scenario: a scanner, a backup tool, a monitoring system, or an internal application suddenly can’t send emails to anyone outside your organization. Internally, everything works fine, but the moment that same device tries to email an external address, it fails.
This happens because Exchange Server, by default, is locked down. Out of the box, its default connectors are only designed to let devices and applications send email to recipients within your own organization. The moment you ask it to relay a message to an external domain, it blocks the attempt because it has no way of knowing whether that request is legitimate, or whether it’s coming from a spammer trying to use your server to send junk mail.
What is an SMTP relay, and why would your business need one?
This is where an anonymous SMTP relay connector comes in. It’s a dedicated, purpose-built connector that allows specific internal devices and applications — ones that can’t log in with a username and password, like printers, scanners, or automated alert systems — to send email to external recipients without authentication.
Is anonymous SMTP relay risky?
This needs to be configured carefully. If it’s set up too broadly, you’re not creating a controlled relay; you’re creating what’s known as an open relay, where literally anyone on the internet could use your Exchange server to send email. That’s a serious risk: it can get your server’s IP address blacklisted, damage your domain’s email reputation, and turn your infrastructure into a spam-sending tool without your knowledge.
So, what’s the safe way to set this up?
The safe approach to configure anonymous SMTP relay in Exchange Server 2016 is to create a dedicated receive connector limited to a specific, known list of internal IP addresses. So only trusted devices can relay through it, and any other device trying to connect from an IP outside that list, including a compromised one on the same network, gets rejected.
Below, our RMM administration team walks you through exactly how to configure this correctly on Exchange Server 2016
Step 1: Open the Receive Connector Wizard
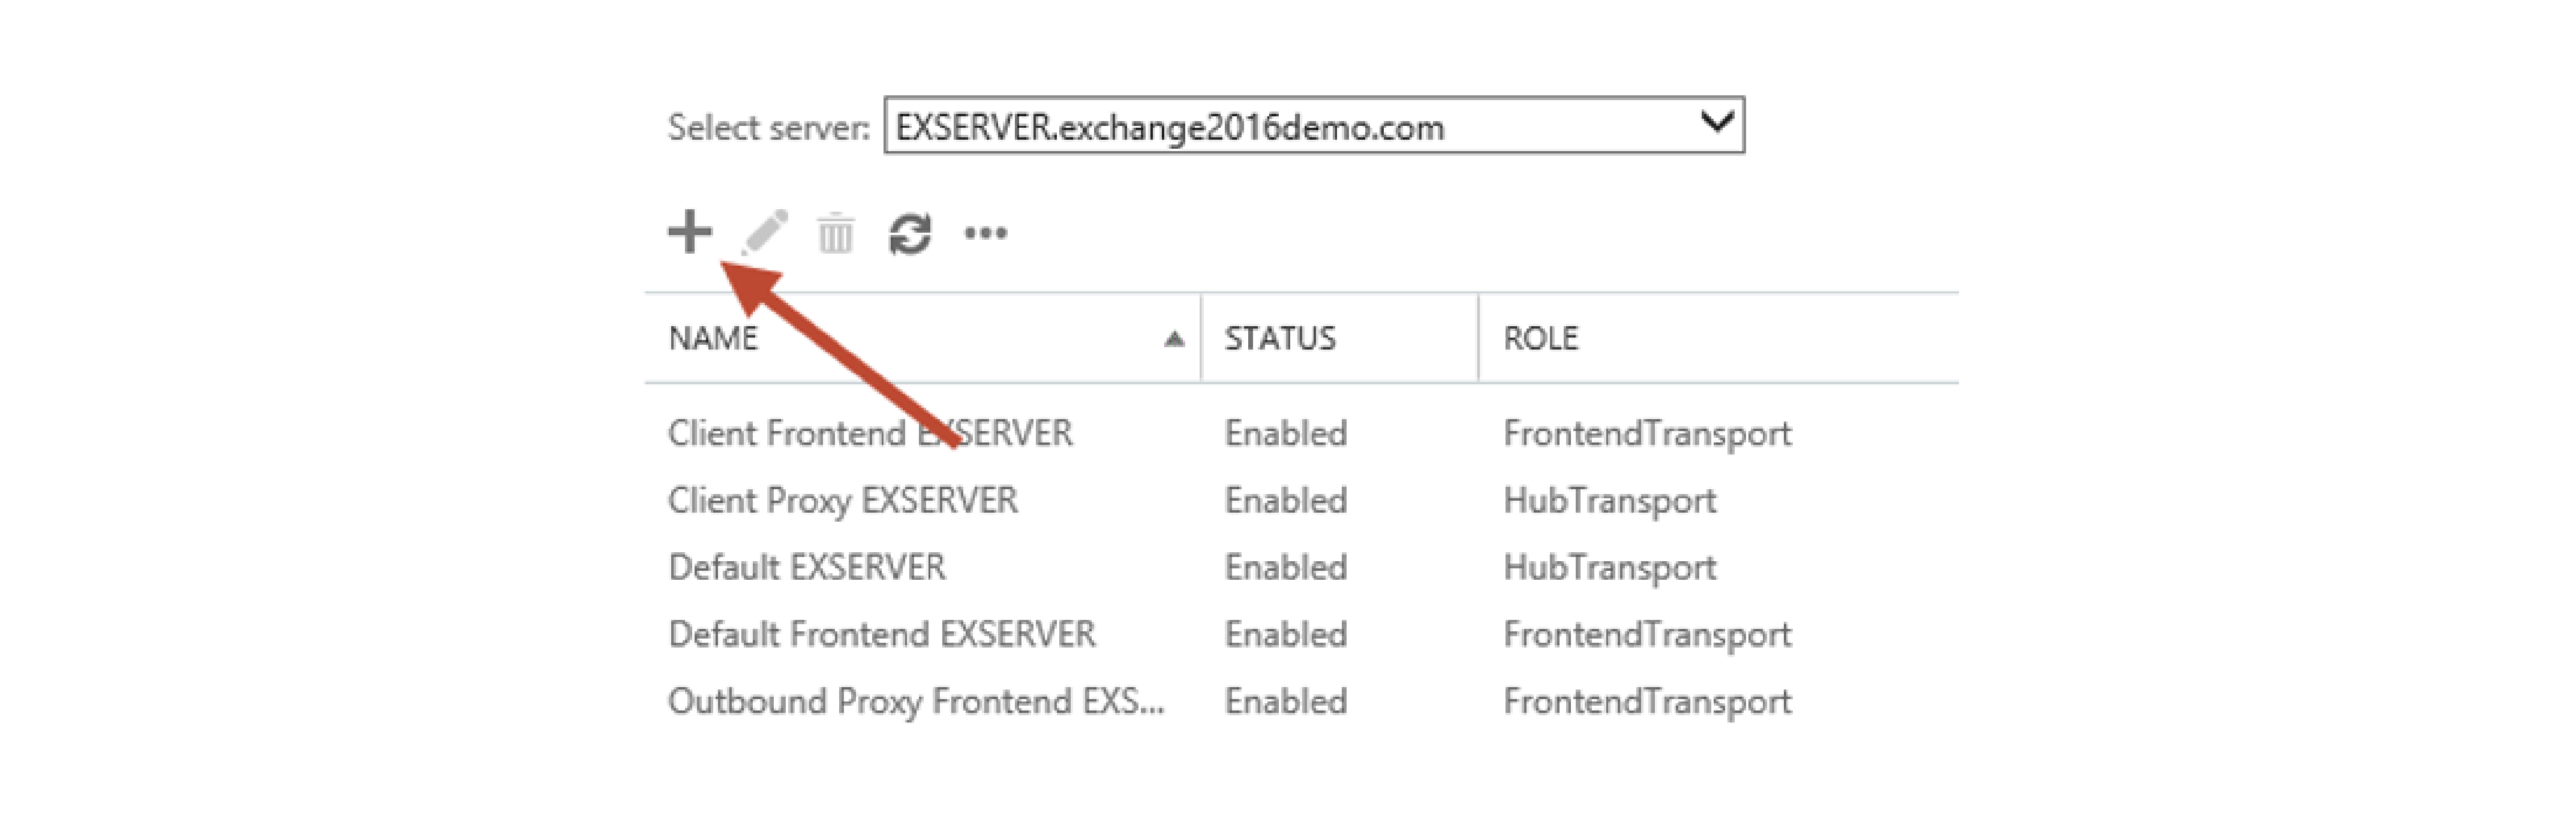
In the Exchange Admin Center, go to Mail Flow, then Receive Connectors. Select the server on which you want to create the new receive connector and click the “+” icon to launch the wizard.
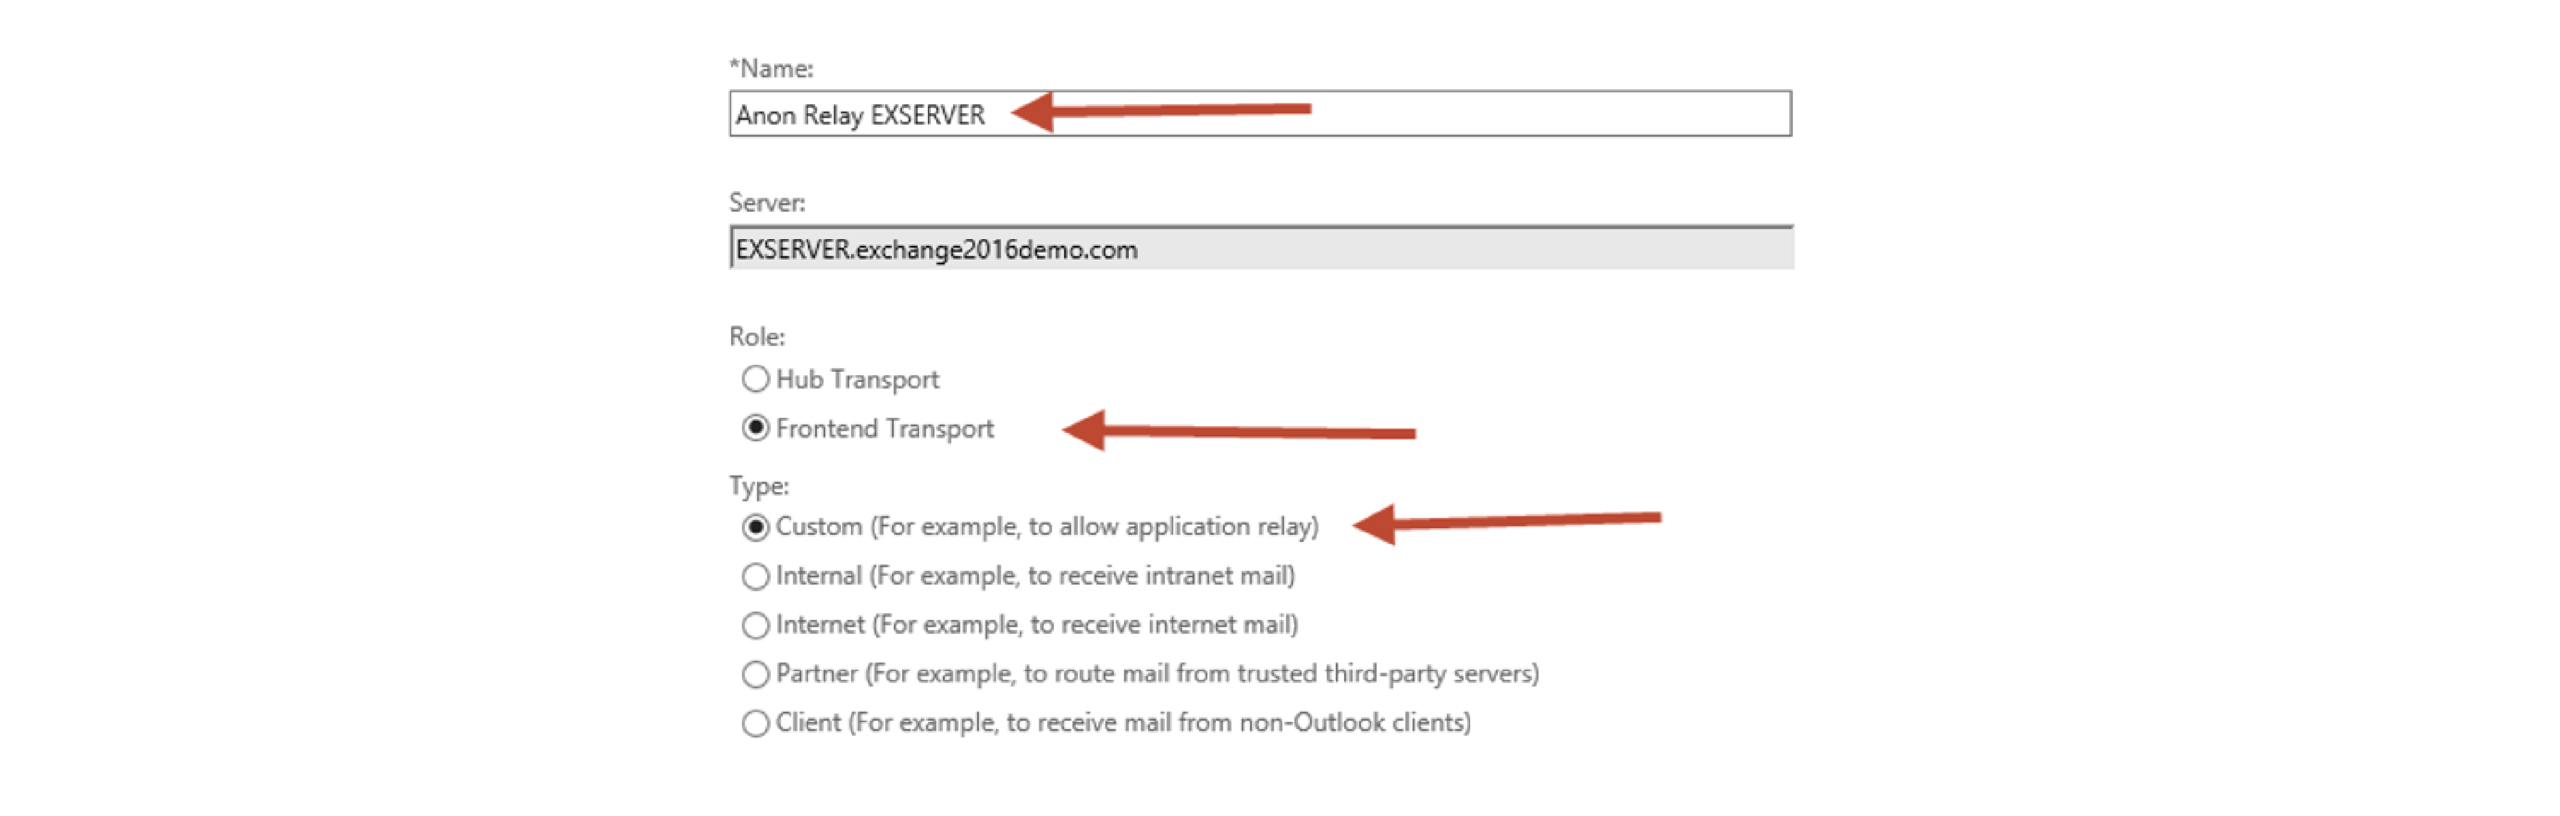
Step 2: Name the Connector and Set Its Role
Give the new connector a name. It’s a good practice to keep the naming consistent with your other default connectors. Set the Role to “Frontend Transport” and the Type to “Custom.”
Step 3: Confirm Network Adapter Bindin
The default network adapter bindings can be left as they are. This setting defines the IP address and port the server will listen on for incoming connections. Note that multiple receive connectors on the Frontend Transport service can listen on the same port (TCP 25).

Step 4: Set the Allowed Remote IP Addresses
Remove the default IP range from the Remote Network Settings, then add the specific IP addresses or IP ranges you want to allow for anonymous SMTP relay. Avoid adding entire IP subnets that contain other Exchange servers, as this can cause issues with server-to-server communication.

Step 5: Complete the Wizard
Click Finish to complete the wizard. A few additional configuration steps are still required after this.
Step 6: Run the Required PowerShell Commands
Open the Exchange Management Shell and run the following two commands:
[PS] C:\>Set-ReceiveConnector “EXSERVER\Anon Relay EXSERVER” -PermissionGroups AnonymousUsers
[PS] C:\>Get-ReceiveConnector “EXSERVER\Anon Relay EXSERVER” | Add-ADPermission -User ‘NT AUTHORITY\Anonymous Logon’ -ExtendedRights MS-Exch-SMTP-Accept-Any-Recipient
Step 7: Test the Connector
You can now test the connector using Telnet from the IP address you added to the remote network settings. In this test environment, that IP address is now allowed to send email from any address (valid or not) to any external recipient:
220 EXSERVER.exchange2016demo.com Microsoft ESMTP MAIL Service ready at Thu, 22
Oct 2015 12:59:39 +1000
hello
250 EXSERVER.exchange2016demo.com Hello [192.168.0.30]
mail from: test@test.com
250 2.1.0 Sender OK
rcpt to: exchangeserverpro@gmail.com
250 2.1.5 Recipient OK
Data
354 Start mail input; end with .
Subject: test
250 2.6.0 <e1739c5f-db11-4fdd-aa27-a9702bc15b15@EXSERVER.exchange2016demo.com> [
InternalId=863288426497, Hostname=EXSERVER.exchange2016demo.com] Queued mail for delivery
Conclusion
Setting up anonymous SMTP relay on Exchange Server 2016 is a small piece of configuration with a big impact — get it right, and your business tools send email reliably. Get it wrong, and you risk turning your own mail server into an open door for spam and abuse.
This is exactly the kind of detail that often gets overlooked until something breaks like a scanner stops emailing, or worse, your domain ends up blacklisted because a relay was left to open. If you’re maintaining Exchange Server in-house, it’s worth periodically checking how your relay connectors and mail flow are configured, especially after any server rebuild or migration.
And if your team is weighing whether it still makes sense to manage Exchange on-premises versus moving toward a cloud-based setup like Microsoft 365, that’s worth factoring into your broader IT roadmap.